 Tweet
Tweet
I had to update a quick how-to video I had done on building your own LED lights. I thought it would be good way to start off the New Year doing what we love...
building stuff!!!
Alan Hopps did a video on LED lights that is also pretty good. His angle is a really inexpensive light and as always is well done. I needed to build a little more durable light on par with what is being commercially sold for a client when the commercially made one were not available in time.
I also wanted to start incorporating the lights in my own show. I have trailer haunts and having a light that just uses a light gauge wire to hold it in place won't work. First time I move the attraction, all the lights will "refocus" themselves on walls and ceilings instead of the props and areas intended. I need to focus the light and have it stay there! I don't want movement of the trailers,customers or actors bumping lights out of focus.
One of the problems I found with some of the lights available is the SMALL brackets. They are using a computer bracket and they are tiny!! I have large hands and I can't tighten the screws without knocking the light off it's intended spot!! Also they are not very "industrial" not intended for this type of use they are not very heavy duty.
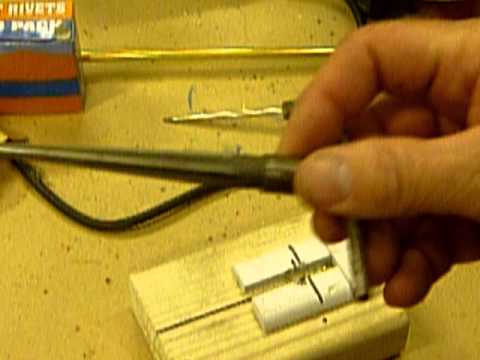
To remedy the situation I utilize the connection of the light on the barrel itself. though the use of a rivetnut. This allows you to use a normal readily available L-bracket which are not only bigger but a lot sturdier to mount your lights to.
I also utilize a brass barrel. I tried aluminium, but the brass will hold up much better. The cost difference is not much and definitely worth the added strength. Same to be said with my style of connection. Sure a little more expense but well worth it in time needed to constantly check and refocus lights on a daily basis.
So check out the video, get some material and start building!!! I built 30 lights from scratch while watching a movie in the shop!! Start now and you will have a TON of lights really for next season!!
Here are a couple scenes lit with LED's By next season both attractions will be switched to LED!!! Enjoy!!!
building stuff!!!
Alan Hopps did a video on LED lights that is also pretty good. His angle is a really inexpensive light and as always is well done. I needed to build a little more durable light on par with what is being commercially sold for a client when the commercially made one were not available in time.
I also wanted to start incorporating the lights in my own show. I have trailer haunts and having a light that just uses a light gauge wire to hold it in place won't work. First time I move the attraction, all the lights will "refocus" themselves on walls and ceilings instead of the props and areas intended. I need to focus the light and have it stay there! I don't want movement of the trailers,customers or actors bumping lights out of focus.
One of the problems I found with some of the lights available is the SMALL brackets. They are using a computer bracket and they are tiny!! I have large hands and I can't tighten the screws without knocking the light off it's intended spot!! Also they are not very "industrial" not intended for this type of use they are not very heavy duty.
To remedy the situation I utilize the connection of the light on the barrel itself. though the use of a rivetnut. This allows you to use a normal readily available L-bracket which are not only bigger but a lot sturdier to mount your lights to.
I also utilize a brass barrel. I tried aluminium, but the brass will hold up much better. The cost difference is not much and definitely worth the added strength. Same to be said with my style of connection. Sure a little more expense but well worth it in time needed to constantly check and refocus lights on a daily basis.
So check out the video, get some material and start building!!! I built 30 lights from scratch while watching a movie in the shop!! Start now and you will have a TON of lights really for next season!!
Here are a couple scenes lit with LED's By next season both attractions will be switched to LED!!! Enjoy!!!
Comment